The Sorry Game Board can be creatively repurposed into a unique item, and at polarservicecenter.net, we understand the value of finding new uses for old items. Consider giving new life to a board game by transforming it into a keepsake box or a DIY storage solution. With a little bit of imagination, you can turn it into a vintage game organizer, a recycled craft project, or even a personalized gift.
1. What is a Sorry Game Board and What Are Its Dimensions?
A Sorry game board is a classic family board game that typically features a colorful, square playing surface with a track for moving pieces. The standard size of a Sorry game board is approximately 20 inches by 20 inches (50.8 cm x 50.8 cm), but dimensions may vary slightly depending on the edition or manufacturer.
Here’s a more detailed breakdown:
- Playing Surface: The primary area where players move their pawns, characterized by a circular or square track.
- Starting Areas: Designated zones, usually four in number, colored differently for each player (e.g., red, yellow, blue, green).
- Safety Zones: Specific spots where a player’s pawn is safe from being bumped back to the start.
- Slide Spaces: Areas on the track that allow players to advance more quickly or bump opponents back.
- Card Deck: While not part of the board, the card deck is essential, dictating how many spaces a player can move.
2. Why Should I Repurpose a Sorry Game Board?
Repurposing a Sorry game board is a sustainable and creative way to breathe new life into an old item. Instead of discarding the board, you can transform it into functional and decorative pieces, reducing waste and adding a personal touch to your home. According to a study by the Environmental Protection Agency (EPA) in 2023, repurposing and upcycling materials can significantly decrease landfill waste, contributing to a more environmentally friendly lifestyle. By turning a vintage game into a DIY storage solution, you’re not just creating something new; you’re also participating in a sustainable practice.
3. What Are Some Creative Ideas for Repurposing a Sorry Game Board?
There are numerous ways to repurpose a Sorry game board, turning it into functional and decorative items. Here are some ideas:
- Keepsake Box: Create a unique box to store trinkets and mementos.
- Wall Art: Transform the board into a colorful piece of wall decor.
- Storage Organizer: Use the board to create compartments for organizing small items.
- Gift Box: Craft a personalized gift box for special occasions.
- Photo Frame: Incorporate sections of the board into a custom photo frame.
- Coasters: Cut the board into smaller squares to make eye-catching coasters.
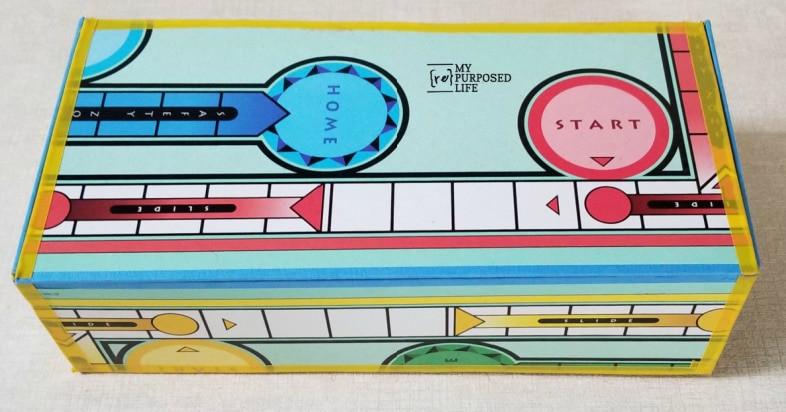
 Repurposed Sorry game board as a keepsake box with colorful design and sentimental value.
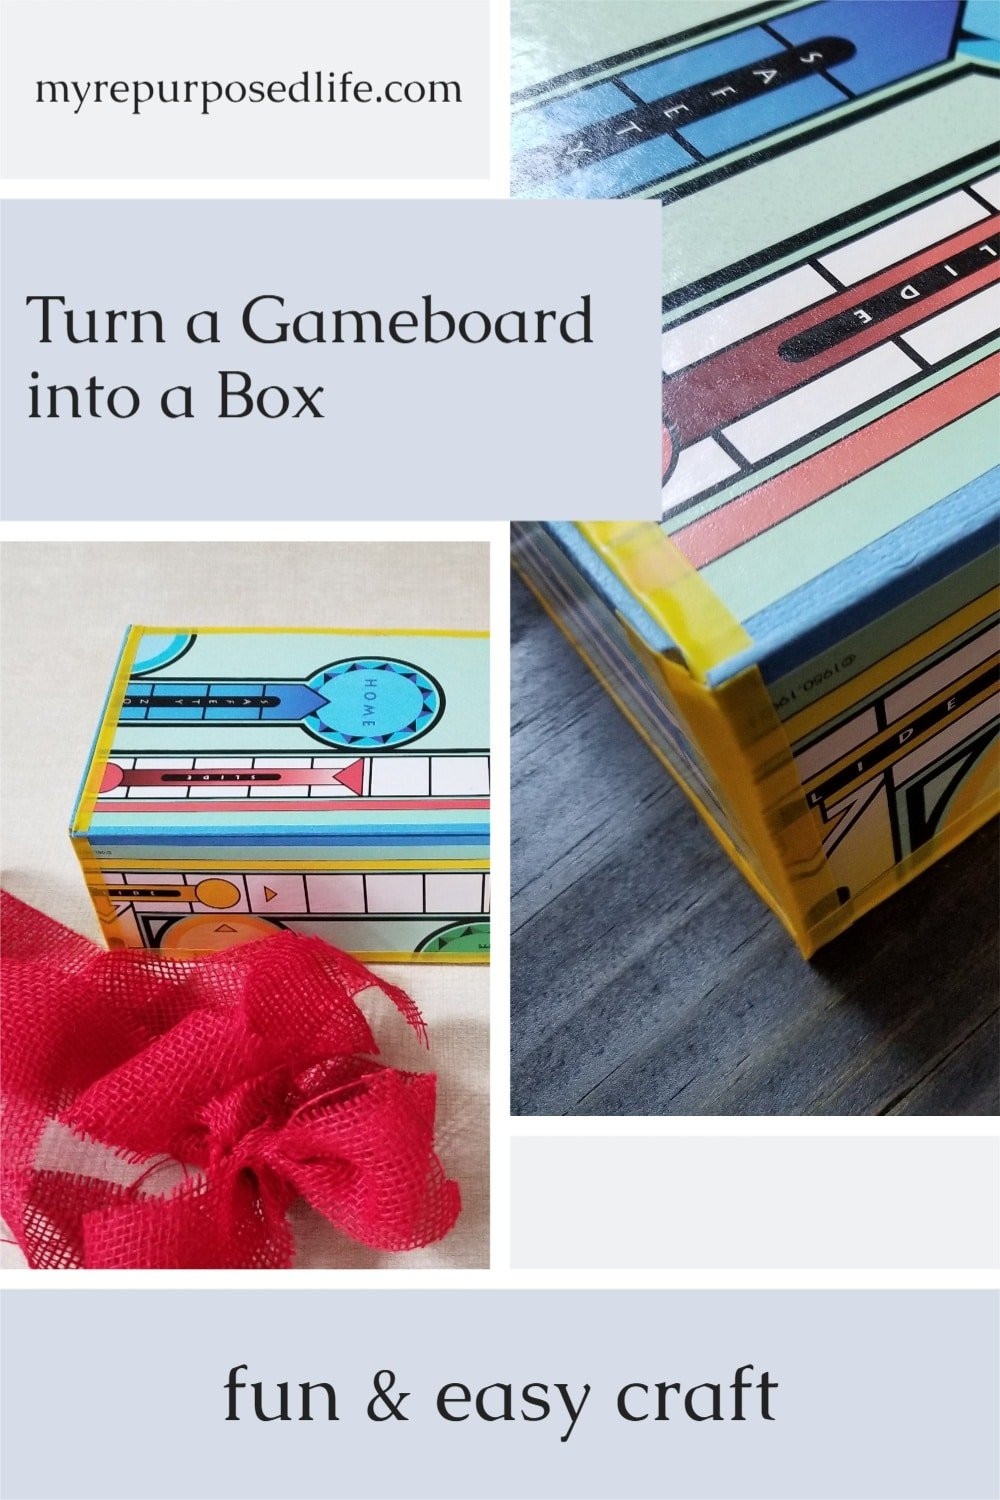
4. How Can I Turn a Sorry Game Board Into a Keepsake Box?
Transforming a Sorry game board into a keepsake box is a fun and creative DIY project. Here are the steps:
- Materials: Gather a Sorry game board, a utility knife, a straight edge (like a yardstick), tape, hot glue gun, hot glue, electrical tape, and ribbon.
- Measure and Cut: Measure and mark lines on the board. The solid lines are for cutting, and the dashed lines are for scoring.
- Score the Lines: Use a utility knife to score the dashed lines. Be careful not to cut through the cardboard entirely.
- Peel the Layers: Patiently score and peel away layers of cardboard on the scored lines. This will allow you to fold each of the four sides to make the box.
- Fold the Box: Fold up the sides, front, and back of the box.
- Secure the Joints: Use electrical tape to secure all the box’s seams.
- Reinforce with Glue: For added strength, apply hot glue to all the joints and seams of the box.
- Decorate: Add ribbon, shred, or other decorative elements to personalize your keepsake box.
5. What Tools and Materials Do I Need to Repurpose a Sorry Game Board?
To repurpose a Sorry game board effectively, you’ll need a few essential tools and materials:
| Tool/Material | Description | Use |
|---|---|---|
| Utility Knife | For cutting and scoring the game board. | To create precise lines and separate sections of the board. |
| Straight Edge | A yardstick or ruler to ensure straight lines. | To guide the utility knife and mark accurate measurements. |
| Cutting Mat | Protects your work surface while cutting. | Prevents damage to tables and floors during cutting. |
| Pencil | For marking measurements and lines. | To outline where cuts and folds need to be made. |
| Tape | To hold pieces together temporarily. | To secure the box’s shape before gluing or taping permanently. |
| Hot Glue Gun | To securely bond the edges and seams. | Provides a strong, lasting hold for the box’s structure. |
| Hot Glue Sticks | Fuel for the hot glue gun. | To melt and apply adhesive to the joints. |
| Electrical Tape | For a clean, colorful finish on the edges. | Covers and reinforces the edges, adding a decorative touch. |
| Ribbon and Shred | To decorate and personalize the finished product. | Adds aesthetic appeal and can be used to create a gift box. |
| Safety Glasses | Protect your eyes from flying debris while cutting. | Prevents eye injuries during the cutting process. |
| Work Gloves | Protect your hands from cuts and hot glue. | Provides a better grip and protects against burns and cuts. |
| Sandpaper (Optional) | For smoothing rough edges. | Creates a smoother, more professional finish. |
| Paint/Mod Podge | For decorating and sealing the repurposed item. | Allows for customization and protects the surface of the board. |
| Clamps (Optional) | To hold pieces together while the glue dries. | Ensures a tight bond and prevents shifting while the adhesive sets. |
| Measuring Tape | To measure dimensions accurately. | To ensure precise cuts and folds. |
| Craft Knife | Alternative to a utility knife for more delicate cuts. | Offers greater control for intricate designs and fine details. |
| Self-Healing Mat | Provides a protective surface for cutting and extends the life of your blades. | Prevents the utility knife from dulling quickly and protects the work surface. |
| Embellishments | Beads, buttons, stickers, etc., for added decoration. | Personalizes the project and adds unique visual elements. |
| Ruler | To draw straight lines and measure accurately. | Ensures accurate cuts and folds. |
| Decorative Paper | To line the inside of the box or cover the outside for added appeal. | Adds a professional and polished look to the finished product. |
| Metal Edges | To reinforce the corners of the box. | Provides extra durability and a clean finish. |
| Magnets | To create a closure for the box lid. | Ensures the lid stays securely closed. |
| Hinges | To create a hinged lid. | Allows for easy opening and closing of the box. |
| Fabric | To line the inside of the box for a softer touch. | Adds a luxurious feel and protects delicate items stored inside. |
| Sealant | To protect the finished project from moisture and wear. | Extends the life of the repurposed item and keeps it looking its best. |
| Varnish | To add a glossy or matte finish. | Enhances the appearance and protects the surface of the project. |
| Polyurethane | To provide a durable, protective coating. | Offers superior protection against scratches and wear. |
| Drill | To make holes for hardware like hinges or magnets. | Allows for the precise installation of hardware. |
| Screwdriver | To secure hardware like hinges or magnets. | Ensures hardware is properly attached. |
| Level | To ensure the box is square and even. | Helps to create a professional-looking finished product. |
| Wood Glue | To reinforce the joints of the box. | Provides a strong bond for added durability. |
| Wood Filler | To fill any gaps or imperfections. | Creates a smooth, seamless finish. |
| Paint Brushes | To apply paint, sealant, or varnish. | Allows for even application of coatings. |
| Rags | To clean up spills and wipe away excess glue or paint. | Keeps the work area clean and ensures a professional finish. |
| Wire Cutters | To cut wire or metal for decorative elements. | Allows for the creation of unique embellishments. |
| Pliers | To bend and shape wire or metal. | Provides greater control and precision when working with wire or metal. |
| Safety Goggles | To protect eyes from dust and debris when sanding or cutting. | Prevents eye injuries during the repurposing process. |
| Dust Mask | To protect lungs from dust and particles when sanding or cutting. | Prevents respiratory irritation and health issues. |
| First Aid Kit | To treat minor cuts or burns. | Ensures immediate care for any injuries sustained during the project. |
| Vacuum Cleaner | To clean up the work area after the project is completed. | Keeps the space tidy and free from debris. |
| Extension Cord | To provide power to tools in a convenient location. | Ensures easy access to electricity. |
| Drop Cloth | To protect the floor or work surface from paint or glue. | Prevents damage and makes cleanup easier. |
| Respirator | To protect lungs from harmful fumes when using strong adhesives or paints. | Ensures respiratory safety when working with potentially hazardous materials. |
| Ear Protection | To protect hearing when using power tools. | Prevents hearing damage during the repurposing process. |
| Workbench | To provide a stable and comfortable work surface. | Makes the project easier and more enjoyable. |
| Task Lighting | To provide adequate lighting for detailed work. | Ensures clear visibility and reduces eye strain. |
| Ruler with Metal Edge | To prevent the utility knife from slipping. | Enhances safety and accuracy when cutting. |
| Rotary Cutter | For cutting fabric or paper smoothly. | Offers greater precision and ease when working with flexible materials. |
| Cutting Machine | Like a Cricut or Silhouette, for creating intricate designs. | Allows for highly detailed and customized embellishments. |
| Sewing Machine | For sewing fabric linings or embellishments. | Provides a professional finish for fabric elements. |
| Iron | For pressing fabric linings or embellishments. | Ensures a smooth and neat appearance. |
| Ironing Board | To provide a stable surface for ironing. | Makes ironing easier and safer. |
| Dressmaker’s Shears | For cutting fabric cleanly and accurately. | Offers superior cutting performance for fabric projects. |
| Seam Ripper | To remove unwanted stitches. | Allows for easy correction of sewing mistakes. |
| Hand Sewing Needles | For hand-sewing embellishments or linings. | Provides versatility for small sewing tasks. |
| Thread | To match fabric linings or embellishments. | Ensures a cohesive and professional look. |
| Thimble | To protect fingers when hand-sewing. | Prevents injury and makes sewing more comfortable. |
| Embroidery Floss | For adding decorative stitching. | Allows for creative and personalized embellishments. |
| Buttons | For closures or decorations. | Adds functional and decorative elements. |
| Snaps | For closures. | Provides a secure and easy-to-use fastening method. |
| Velcro | For closures or attaching elements. | Offers a versatile and adjustable fastening solution. |
| Grommets | For reinforcing holes. | Provides a durable and professional finish for holes. |
| Eyelets | For creating decorative openings. | Adds visual appeal and can be used for lacing or threading. |
| Hole Punch | For creating holes. | Ensures clean and precise holes. |
| Leather Punches | For creating holes in leather. | Designed specifically for working with leather. |
| Leather Needles | For sewing leather. | Allows for easy sewing of leather projects. |
| Leather Thread | Strong thread for sewing leather. | Ensures a durable and long-lasting seam. |
| Edge Beveler | For rounding the edges of leather. | Creates a smooth and professional finish. |
| Leather Dye | For coloring leather. | Allows for customized color and appearance. |
| Leather Finish | For protecting and sealing leather. | Extends the life of the leather project and keeps it looking its best. |
| Rivets | For joining pieces of leather. | Provides a strong and decorative fastening method. |
| Rivet Setter | For setting rivets. | Ensures proper installation of rivets. |
| Swivel Knife | For cutting intricate designs in leather. | Allows for highly detailed and customized leatherwork. |
| Modeling Tools | For shaping and molding leather. | Provides versatility for creating unique leather designs. |
| Stamping Tools | For adding designs to leather. | Allows for personalized and decorative leather stamping. |
| Embossing Tools | For creating raised designs on leather. | Adds a textured and dimensional effect to leather projects. |
| Burnishing Tools | For smoothing and polishing the edges of leather. | Creates a professional and refined finish. |
| Beeswax | For waxing thread to strengthen it. | Improves the durability and handling of thread. |
| Lighter | For burning off the ends of thread to prevent fraying. | Ensures a clean and neat finish. |
| Glue for Leather | To bond pieces of leather. | Provides a strong and lasting hold. |
| Clamps for Leather | To hold pieces of leather together while the glue dries. | Ensures a tight bond and prevents shifting. |
| Mallet | For striking stamping or embossing tools. | Provides the necessary force for creating clear impressions. |
| Awl | For making holes in leather. | Creates precise holes for stitching or hardware. |
| Scratch Awl | For marking lines on leather. | Ensures accurate and visible markings. |
| Wing Divider | For marking parallel lines on leather. | Provides consistent and even lines for decorative or functional purposes. |
| Edge Creaser | For creating a decorative crease along the edge of leather. | Adds a refined and professional touch. |
| Overstitch Wheel | For marking evenly spaced stitching holes. | Ensures consistent and neat stitching. |
| Bone Folder | For smoothing and creasing paper or fabric. | Provides a clean and professional finish for papercraft projects. |
| Paper Cutter | For cutting paper accurately. | Ensures precise and clean cuts for paper projects. |
| Scoring Board | For creating crisp folds in paper. | Adds a professional touch to cards and other papercrafts. |
| Embossing Folders | For creating textured designs on paper. | Adds depth and dimension to paper projects. |
| Stencils | For adding designs to paper or fabric. | Allows for consistent and repeatable designs. |
| Heat Gun | For embossing with powders. | Creates a raised and textured effect. |
| Embossing Powders | For creating raised designs. | Adds visual interest and dimension. |
| Paper Punches | For creating decorative shapes. | Allows for quick and easy embellishments. |
| Corner Rounder Punch | For rounding the corners of paper. | Adds a professional and polished look. |
| Border Punches | For creating decorative borders. | Enhances the visual appeal of paper projects. |
| Washi Tape | Decorative tape for embellishing. | Adds color and pattern. |
| Cardstock | Sturdy paper for card making. | Provides a durable and professional base for cards. |
| Patterned Paper | Decorative paper for various projects. | Adds visual interest and style. |
| Acetate | Transparent sheet for creating windows or overlays. | Adds a unique and modern touch. |
| Vellum | Translucent paper for creating soft effects. | Provides a subtle and elegant look. |
| Calligraphy Pens | For adding elegant lettering. | Adds a personal and artistic touch. |
| Watercolors | For creating artistic backgrounds. | Adds depth and vibrancy. |
| Ink Pads | For stamping designs. | Provides a variety of colors and effects. |
| Blending Tools | For creating smooth transitions in colors. | Adds depth and dimension. |
| Palette Knives | For applying paint or texture paste. | Adds artistic effects and texture. |
| Texture Paste | For creating textured surfaces. | Adds visual interest and dimension. |
| Gesso | For priming surfaces for painting. | Creates a smooth and even base. |
| Stretched Canvas | For painting. | Provides a stable and professional surface. |
| Easel | For holding canvas. | Makes painting easier and more comfortable. |
| Paint Brushes | For applying paint. | Comes in a variety of shapes and sizes. |
| Palette | For mixing paint. | Keeps colors organized and easy to access. |
| Artist’s Tape | For masking areas. | Creates clean lines and sharp edges. |
| Fixative | For sealing artwork. | Protects the surface from damage. |
| Varnishes | For adding a protective layer and sheen. | Enhances the colors and protects the surface. |
| Palette Cleaning Tools | For cleaning palettes and brushes. | Keeps tools in good condition. |
| Sponges | For creating textures. | Adds unique effects and patterns. |
| Rags | For cleaning spills and wiping brushes. | Keeps the workspace clean and tidy. |
| Mediums | For altering the properties of paint. | Enhances the texture, gloss, or drying time. |
| Retarder | For slowing down the drying time of paint. | Allows for more blending and detail work. |
| Iridescent Paint | For adding shimmer and shine. | Creates a unique and eye-catching effect. |
| Metallic Paint | For adding a metallic finish. | Adds a sophisticated and luxurious look. |
| Crackle Medium | For creating a cracked finish. | Adds a vintage and distressed look. |
| Gilding Supplies | For applying gold leaf. | Creates a luxurious and elegant effect. |
| Transfer Paper | For transferring designs onto surfaces. | Allows for precise and detailed designs. |
| Sealer | For protecting the surface. | Extends the life of the project. |
| Primer | For preparing the surface. | Creates a smooth and even base. |
| Sandpaper | For smoothing rough edges. | Ensures a professional and polished finish. |
| Tack Cloth | For removing dust. | Ensures a clean and smooth surface. |
| Wire Brush | For cleaning metal. | Removes rust and debris. |
| Rust Remover | For removing rust. | Prepares metal for painting or sealing. |
| Metal Polish | For polishing metal. | Enhances the shine and luster. |
| Patina Solutions | For creating an aged look. | Adds character and depth. |
| Seam Sealer | For preventing fraying. | Ensures a durable and professional finish. |
| Iron-on Adhesive | For attaching fabric without sewing. | Provides a quick and easy solution for fabric projects. |
| Fabric Glue | For bonding fabric. | Creates a strong and lasting hold. |
| Fusible Interfacing | For adding structure to fabric. | Provides stability and support. |
| Batting | For adding cushioning. | Creates a soft and comfortable finish. |
| Backing Fabric | For finishing the back of a project. | Provides a clean and professional look. |
| Binding Fabric | For finishing the edges of a project. | Adds a decorative touch and protects the edges. |
| Bias Tape | For finishing curved edges. | Provides flexibility and ease of use. |
| Pinking Shears | For preventing fabric from fraying. | Creates a decorative edge. |
| Rotary Cutter | For cutting fabric. | Provides precision and speed. |
| Acrylic Paint | For painting on various surfaces. | Versatile and durable. |
| Chalk Paint | For creating a matte finish. | Adds a vintage and distressed look. |
| Spray Paint | For quick and even coverage. | Convenient and efficient. |
| Fabric Markers | For drawing on fabric. | Permanent and fade-resistant. |
| Stencils | For adding designs. | Reusable and versatile. |
| Decoupage Glue | For adhering paper cutouts. | Creates a smooth and durable finish. |
| Crackle Varnish | For creating a crackled effect. | Adds a vintage look. |
| Gilding Flakes | For adding a metallic finish. | Creates a luxurious look. |
| Beads | For embellishing projects. | Adds texture and sparkle. |
| Sequins | For adding sparkle. | Creates a glamorous look. |
| Ribbons | For tying or embellishing. | Adds color and texture. |
| Buttons | For adding closures or decorations. | Practical and decorative. |
| Lace | For adding a delicate touch. | Adds elegance and texture. |
| Flowers | For embellishing projects. | Adds a touch of nature. |
| Feathers | For adding texture. | Creates a unique and whimsical look. |
| Twine | For tying or embellishing. | Adds a rustic touch. |
| Charms | For adding decorative elements. | Personal and meaningful. |
| Embellishments | For adding visual interest. | Personalize projects. |
| Stamps | For adding designs. | Versatile and customizable. |
| Stencils | For creating patterns. | Reusable and affordable. |
By having these tools and materials on hand, you’ll be well-equipped to tackle a variety of repurposing projects and give new life to old items.
6. What Are the Safety Precautions to Consider When Repurposing a Sorry Game Board?
When repurposing a Sorry game board, safety should be a top priority. Here are some precautions to keep in mind:
- Use Safety Glasses: Protect your eyes from dust and debris while cutting or sanding.
- Wear Work Gloves: Protect your hands from cuts and hot glue burns.
- Ventilation: Work in a well-ventilated area, especially when using paints or adhesives.
- Cutting Mat: Always use a cutting mat to protect your work surface.
- Supervise Children: If children are involved, ensure they are supervised to prevent accidents.
7. How Do I Decorate My Repurposed Sorry Game Board Project?
Decorating your repurposed Sorry game board project is where you can let your creativity shine. Here are some ideas to personalize your creation:
- Paint: Use acrylic paints to add color and designs to the board.
- Mod Podge: Apply Mod Podge to seal and protect the surface.
- Ribbon: Add ribbon for a decorative touch.
- Stickers: Use stickers to personalize your project.
- Photos: Incorporate photos for a sentimental touch.
 Sorry game board repurposed into a wall art piece with vibrant colors and creative patterns.
8. Can I Use Other Game Boards for Repurposing Projects?
Yes, other game boards can also be repurposed into various projects. Monopoly, Scrabble, and Clue boards can be transformed into decorative items, storage solutions, or even furniture pieces. The key is to assess the board’s material and size to determine the best repurposing project.
9. Where Can I Find Inspiration for Repurposing a Sorry Game Board?
Finding inspiration for repurposing a Sorry game board is easy with the wealth of resources available online. Here are some great places to look:
- Pinterest: Search for “repurposed game board” or “DIY game board projects.”
- Blogs: Check out DIY and crafting blogs for step-by-step tutorials.
- YouTube: Watch videos on repurposing game boards for visual inspiration.
- Etsy: Browse handmade items for unique ideas and designs.
10. How Can I Ensure My Repurposed Sorry Game Board Project is Durable?
To ensure your repurposed Sorry game board project is durable and long-lasting, consider these tips:
- Use Strong Adhesives: Opt for high-quality adhesives like hot glue or epoxy.
- Reinforce Joints: Use electrical tape or metal brackets to reinforce corners and seams.
- Seal the Surface: Apply Mod Podge or varnish to protect the surface from moisture and wear.
- Handle with Care: Avoid placing heavy items on your repurposed project to prevent damage.
11. What Are the Benefits of Using Electrical Tape on a Sorry Game Board Box?
Electrical tape provides several benefits when used on a Sorry game board box:
- Durability: It adds an extra layer of protection to the edges and seams, preventing wear and tear.
- Aesthetics: Electrical tape comes in various colors, allowing you to add a decorative touch.
- Flexibility: It is flexible and can easily conform to the shape of the box.
- Water Resistance: It offers some protection against moisture, which can help preserve the integrity of the cardboard.
12. How Can I Add a Professional Finish to My Repurposed Sorry Game Board Project?
Achieving a professional finish on your repurposed Sorry game board project involves attention to detail and the use of quality materials. Here are some tips to help you achieve a polished look:
- Smooth Edges: Use sandpaper to smooth any rough edges before painting or decorating.
- Even Coating: Apply paint or sealant in thin, even coats to avoid drips and streaks.
- Clean Lines: Use painter’s tape to create clean lines when painting designs.
- Quality Materials: Invest in high-quality paints, adhesives, and decorative elements.
13. What Kind of Adhesive Should I Use for Repurposing a Sorry Game Board?
The best type of adhesive for repurposing a Sorry game board depends on the specific project and materials you are using. Here are some recommendations:
- Hot Glue: Ideal for quick and strong bonding of edges and seams.
- Epoxy: Provides a very strong and durable bond, suitable for heavy-duty projects.
- Wood Glue: Suitable for projects that involve joining wooden elements.
- Craft Glue: Versatile and suitable for a variety of materials, including paper, fabric, and embellishments.
- Mod Podge: Excellent for sealing and protecting the surface of your project, as well as adhering paper cutouts and fabric.
14. How Do You Cut a Game Board Neatly?
Cutting a game board neatly requires precision and the right tools. Follow these steps for clean cuts:
- Marking: Use a ruler and pencil to mark the cutting lines clearly.
- Cutting Mat: Place the game board on a self-healing cutting mat to protect your work surface.
- Utility Knife: Use a sharp utility knife for precise cuts.
- Straight Edge: Guide the knife along a straight edge, applying steady pressure.
- Multiple Passes: Make several light passes instead of trying to cut through the board in one go.
- Sand Edges: Sand the cut edges lightly to smooth them and remove any rough spots.
15. Can a Sorry Game Board Be Used As A Wall Decor?
Yes, a Sorry game board can be repurposed as a unique and colorful piece of wall decor. Here are some creative ideas:
- Framed Art: Frame the entire game board as a nostalgic piece of art.
- Collage: Cut the board into smaller pieces and create a collage.
- Decorative Panels: Use sections of the board to create decorative panels for a gallery wall.
- Message Board: Add corkboard to the back and use it as a fun message board.
 Sorry game board repurposed into a framed piece of wall art, showcasing its colorful design and nostalgic appeal.
16. What Type of Fabric Should I Use to Line a Sorry Game Board Box?
The type of fabric you choose to line a Sorry game board box depends on the desired look and feel. Here are some suggestions:
- Felt: Soft and easy to work with, felt adds a cozy touch to the inside of the box.
- Cotton: Versatile and available in a wide range of colors and patterns.
- Satin: Adds a luxurious and elegant touch to the interior.
- Burlap: Provides a rustic and textured look.
- Velvet: Adds a soft and plush feel to the inside of the box.
17. How Can I Make Sure the Corners of My Sorry Game Board Box Are Secure?
Securing the corners of your Sorry game board box is crucial for ensuring its durability and stability. Here are some effective methods:
- Hot Glue: Apply hot glue generously to the inside and outside of the corners.
- Electrical Tape: Wrap electrical tape tightly around the corners for added support.
- Metal Brackets: Attach metal brackets to the inside corners for a more robust reinforcement.
- Corner Clamps: Use corner clamps to hold the corners together while the glue dries.
18. What Can I Use to Seal a Repurposed Sorry Game Board?
Sealing a repurposed Sorry game board is essential for protecting the surface and enhancing its durability. Here are some effective sealants:
- Mod Podge: A versatile sealant that can be used on a variety of surfaces, including paper, fabric, and wood.
- Acrylic Sealer: Provides a clear and durable finish that protects against moisture and wear.
- Varnish: Adds a glossy or matte finish and protects the surface from scratches and fading.
- Polyurethane: Offers a tough and long-lasting protective coating, ideal for projects that will be exposed to heavy use.
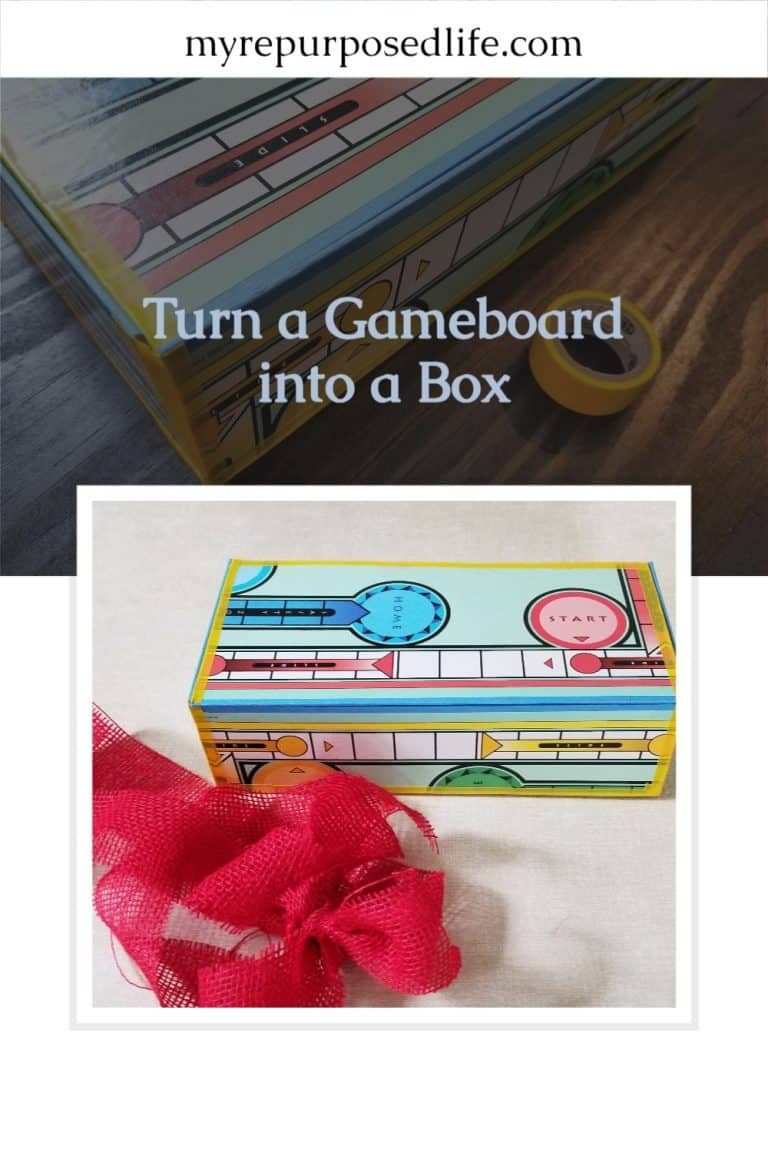
19. Is a Repurposed Sorry Game Board Box a Good Gift Idea?
Yes, a repurposed Sorry game board box makes an excellent gift idea. It is unique, personalized, and eco-friendly, making it a thoughtful and memorable present. You can customize the box to suit the recipient’s tastes and interests, adding photos, embellishments, or a special message. It’s also a great way to give a second life to an old item, promoting sustainability and creativity.
20. How to Avoid the Sorry Game Board from Collapsing After Assembling It?
To prevent your Sorry game board box from collapsing after assembly, follow these steps:
- Reinforce Seams: Use hot glue and electrical tape to reinforce all seams and joints.
- Support Corners: Add metal brackets or corner clamps to the inside corners for extra support.
- Use Thick Cardboard: If possible, use a thicker cardboard or reinforce the existing cardboard with an additional layer.
- Apply Even Pressure: When assembling the box, apply even pressure to ensure all sides are properly aligned and secured.
- Let Glue Dry Completely: Allow the glue to dry completely before adding any weight or stress to the box.
