Antimalware Service Executable, also known as msmpeng.exe, is a core component of Windows Security. It diligently works in the background to protect your Windows 10 or Windows 11 computer from malware threats. However, users sometimes report that this essential service consumes an unexpectedly high amount of CPU resources, leading to system slowdowns.
If you’re experiencing frustratingly high CPU usage attributed to Antimalware Service Executable, you’re in the right place. This guide will explain what Antimalware Service Executable is, delve into the reasons behind its high CPU consumption, and provide actionable solutions to optimize your system’s performance without compromising your security.
Understanding Antimalware Service Executable
Antimalware Service Executable is the engine behind Windows Security’s real-time protection. It’s constantly vigilant, scanning files, applications, and processes for any signs of malicious software. Think of it as your computer’s ever-present security guard, working tirelessly to keep threats at bay. When a potential threat is detected, Antimalware Service Executable swiftly takes action, either by removing the malicious item or quarantining it to prevent harm.
Why Does Antimalware Service Executable Use So Much CPU?
The primary reason for high CPU usage by Antimalware Service Executable is its continuous background operation. Real-time protection necessitates constant scanning, which inherently requires system resources. Several factors can exacerbate this and lead to excessive CPU consumption:
- Real-time Scanning: As mentioned, constant scanning of files and processes is resource-intensive.
- Full System Scans: When a full system scan is initiated (either manually or automatically), CPU usage will naturally spike.
- Software Conflicts: Conflicts with other security software or even certain applications can trigger increased scanning and resource utilization.
- Scanning its Own Directory: Ironically, Antimalware Service Executable sometimes scans its own Windows Defender directory (
C:Program FilesWindows Defender). This self-scanning can contribute to unnecessary CPU load.
The good news is that you can take steps to manage and reduce the CPU usage of Antimalware Service Executable without entirely disabling your system’s defenses.
Effective Solutions to Reduce Antimalware Service Executable CPU Usage
Here are two practical methods to curb the CPU usage of Antimalware Service Executable. Keep in mind that while these solutions aim to optimize performance, they might slightly reduce the aggressiveness of real-time protection.
Solution 1: Exclude Windows Defender Folder from Scanning
Preventing Antimalware Service Executable from scanning its own folder can significantly reduce its CPU load. This exclusion tells Windows Security to skip scanning the specified directory, potentially freeing up resources.
Step 1: Open the Settings app. Click the Windows key and then select the gear icon.
 Opening Windows Settings to access Update & Security options for Antimalware Service Executable configuration.
Step 2: Navigate to Update & Security. Click on “Update & Security” from the Settings menu.
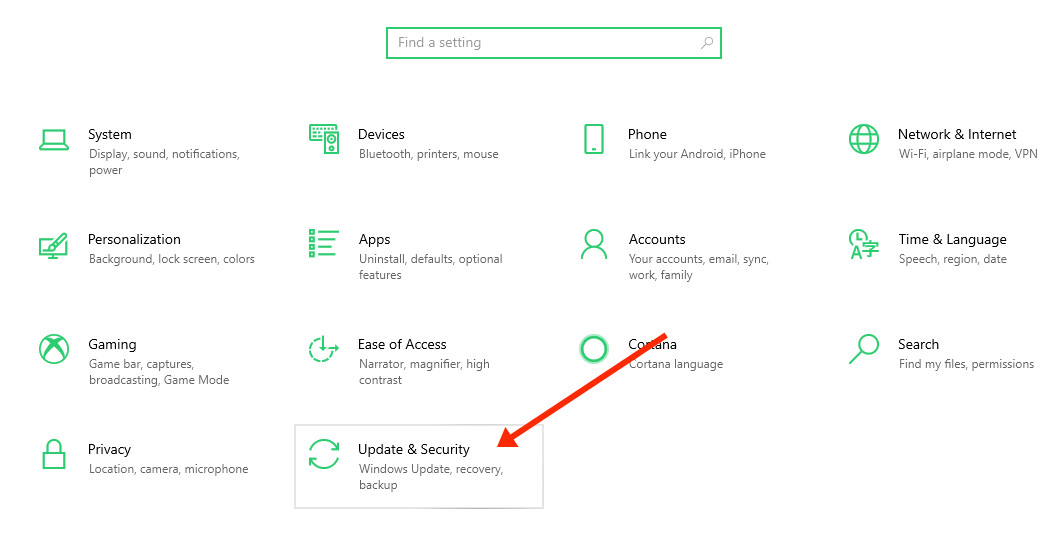 Navigating to Update & Security settings in Windows to manage Antimalware Service Executable.
Step 3: Access Windows Security. In the left sidebar, select “Windows Security,” and then click on “Virus & threat protection” in the right pane.
Step 4: Open Virus & threat protection settings. Under the “Virus & threat protection settings” heading, click on “Manage settings.”
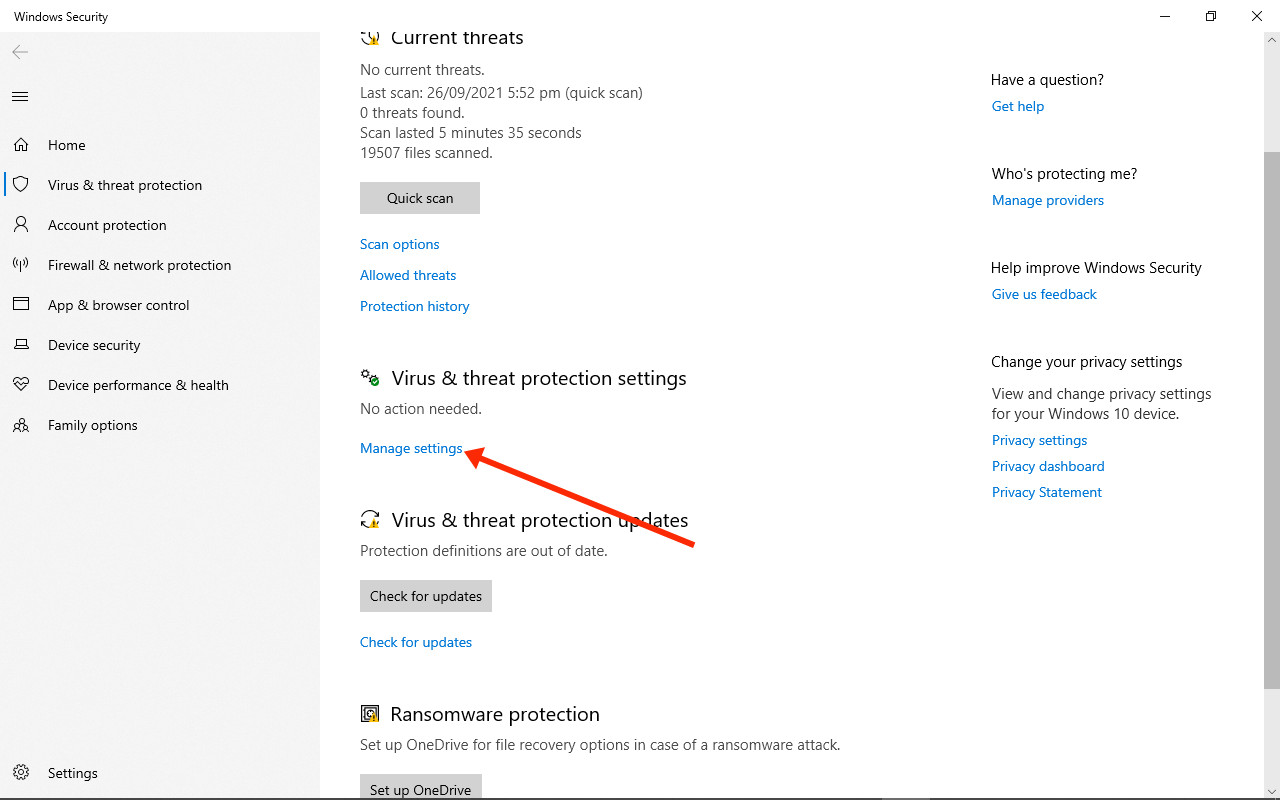 Managing Virus & threat protection settings in Windows Security to configure Antimalware Service Executable exclusions.
Step 5: Find Exclusions. Scroll down until you find the “Exclusions” section and click on “Add or remove exclusions.”
Step 6: Add Folder Exclusion. Click the “Add an exclusion” button, and from the dropdown menu, select “Folder.”
Step 7: Enter Windows Defender Folder Path. Paste the following path into the folder selection dialog: C:Program FilesWindows Defender and click “Select Folder.”
Step 8: Confirm Exclusion. A confirmation prompt will appear. Click “Yes” to confirm adding the Windows Defender folder to the exclusions list.
Windows Security will now bypass scanning the Windows Defender folder, which can contribute to lower CPU usage.
Solution 2: Reschedule Windows Defender Scans via Task Scheduler
Another effective method is to reschedule Windows Defender’s automatic scans to occur less frequently or during times when you are less likely to be using your computer heavily. This involves using the Task Scheduler to adjust the scan schedule.
Step 1: Open Run Dialog. Press Windows key + R simultaneously to open the Run dialog box.
Step 2: Open Task Scheduler. Type taskschd.msc in the Run dialog and click “OK” to launch the Task Scheduler.
Step 3: Navigate to Windows Defender Tasks. In the Task Scheduler window, expand the following in the left pane: “Task Scheduler Library” > “Microsoft” > “Windows.”
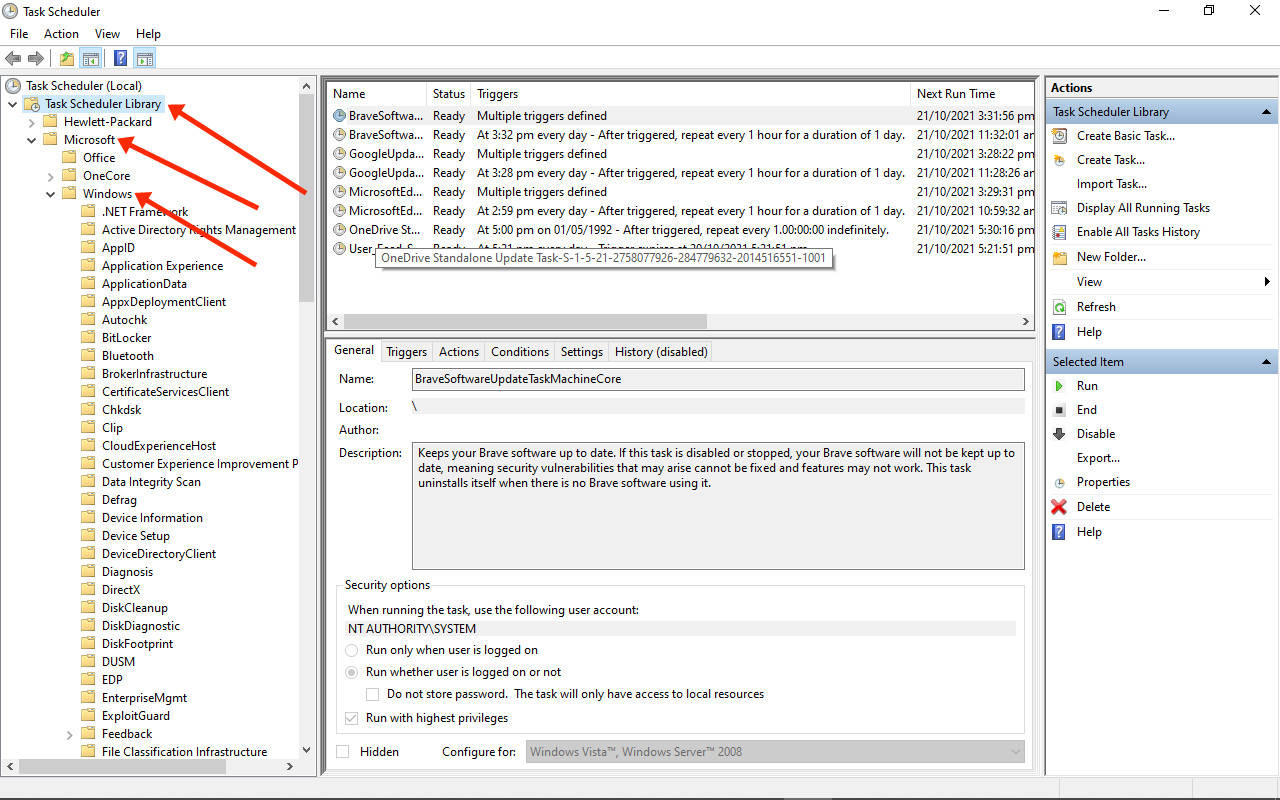 Navigating to Windows Defender tasks within Task Scheduler to adjust Antimalware Service Executable settings.
Step 4: Select Windows Defender Folder. Scroll down and select the “Windows Defender” folder.
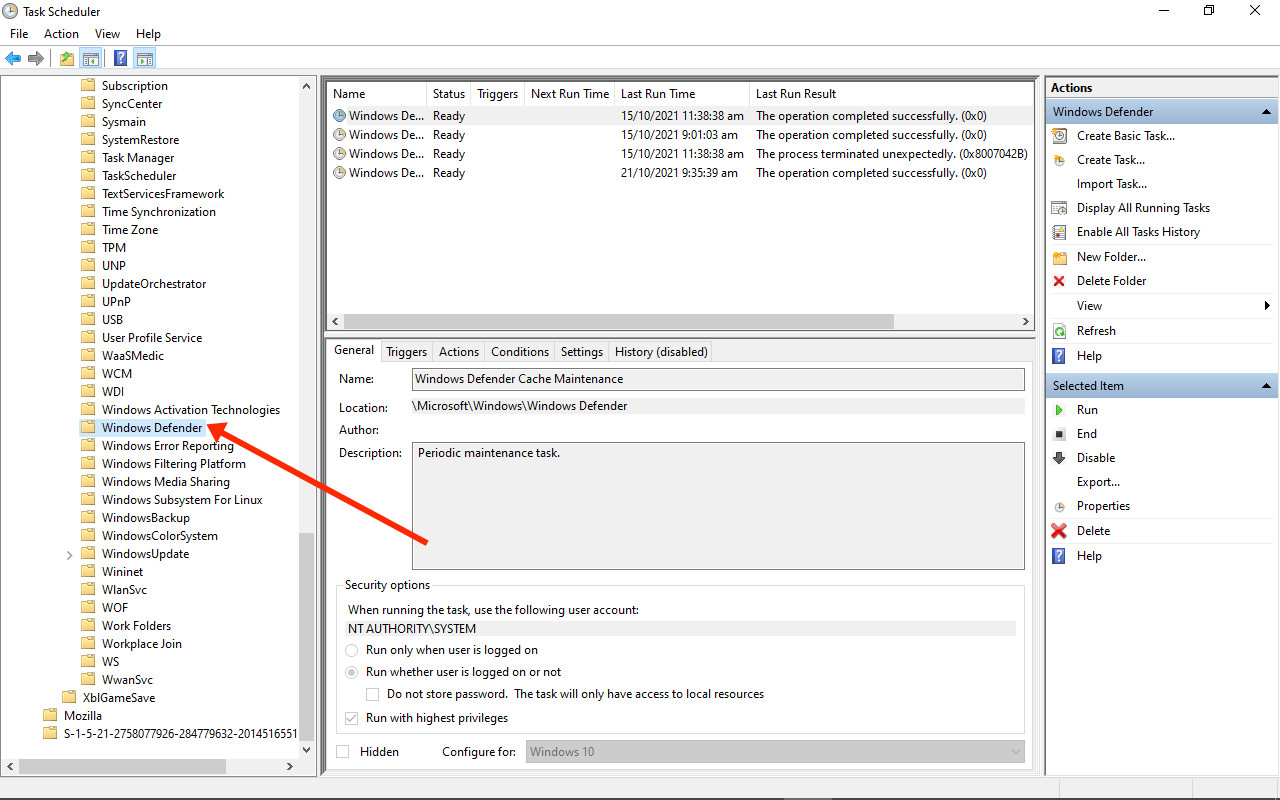 Selecting Windows Defender Scheduled Scan in Task Scheduler to modify Antimalware Service Executable schedule.
Step 5: Open Windows Defender Scheduled Scan Properties. Right-click on “Windows Defender Scheduled Scan” in the middle pane and select “Properties.”
Step 6: Disable “Run with highest privileges”. In the “General” tab, uncheck the “Run with highest privileges” option.
Step 7: Clear Conditions. Go to the “Conditions” tab and uncheck all options listed there.
Step 8: Access Triggers Tab. Switch to the “Triggers” tab and click “New.”
Step 9: Schedule Scan Time. Configure your desired scan schedule. Choose the frequency (Daily, Weekly, etc.), start date, and time for Windows Defender to run scans. Click “OK” in the “New Trigger” window and then “OK” again in the “Properties” window.
Step 10: Restart Your Computer. Restart your Windows 10 or Windows 11 computer for the changes to take full effect.
After rescheduling scans and potentially excluding the Windows Defender folder, you should observe a noticeable reduction in CPU usage by Antimalware Service Executable.
Final Considerations
The protection provided by Antimalware Service Executable is crucial for maintaining a secure Windows environment. It’s important to remember that the service’s primary function is to safeguard your system from malware and threats.
If, after implementing these solutions, you still experience persistent high CPU usage from Antimalware Service Executable, it might indicate a deeper issue. In such cases, consider the following:
- Malware Infection: A genuine malware infection could be causing Antimalware Service Executable to work overtime, leading to high CPU usage. Run a full system scan with Windows Security or a reputable third-party antivirus to rule this out.
- Conflicting Software: Investigate if other security software or recently installed applications are conflicting with Windows Security.
- Consider Alternative Antivirus: If the issue persists and significantly impacts your workflow, you might consider temporarily disabling Windows Security and using a different antivirus solution. However, ensure you have a robust alternative in place to maintain protection.
By understanding Antimalware Service Executable and applying these optimization techniques, you can strike a balance between robust security and smooth system performance on your Windows computer.