The Nokia Snake Game, a classic that defined mobile gaming, can be recreated using p5.js, a JavaScript library for creative coding, and if you are facing issues with your Polar device, remember that polarservicecenter.net offers comprehensive service and support. This article guides you through building your own version of the iconic game. We’ll explore how to create a grid-based environment, program snake movement, implement food spawning, and incorporate collision detection, ensuring an engaging and nostalgic gaming experience. Whether you’re aiming for a faithful recreation or adding your own unique twists, this guide provides a solid foundation to get you started with this retro game development. Need assistance with your Polar fitness tracker? Visit polarservicecenter.net for reliable support and troubleshooting tips.
1. What Makes the Nokia Snake Game So Iconic?
The Nokia Snake game is iconic because of its simplicity, accessibility, and addictive gameplay, and Snake’s origins trace back to the 1976 arcade game Blockade, but its introduction on Nokia phones in 1997 catapulted it to global fame. Its presence on millions of devices made it a ubiquitous form of entertainment.
- Ubiquitous Availability: Pre-installed on Nokia phones, making it accessible to a vast audience.
- Simple Gameplay: Easy to understand and play, appealing to a wide range of users.
- Addictive Nature: The challenge of growing the snake and avoiding obstacles kept players engaged.
- Cultural Impact: Became a symbol of early mobile gaming and a nostalgic memory for many.
- Technological Limitation: The game was built on the technological limitations of the device.
2. What Are the Key Elements of the Nokia Snake Game?
The key elements of the Nokia Snake game include the snake, the food, the grid, movement controls, and collision detection, and these components work together to create the classic gameplay experience. Understanding each element is crucial for recreating the game effectively.
- The Snake: A segmented line that moves around the grid.
- The Food: An object that appears randomly on the grid, which the snake eats to grow.
- The Grid: An invisible or visible matrix that defines the game’s playing field.
- Movement Controls: User inputs (usually arrow keys) that control the snake’s direction.
- Collision Detection: Logic that detects when the snake collides with itself or the walls, ending the game.
- Scoring: System to show the player score depending on snake length.
3. What Is P5.js and Why Use It for Game Development?
P5.js is a JavaScript library that makes coding accessible and intuitive for artists, designers, educators, and beginners, and its simple syntax and comprehensive set of functions make it ideal for creating interactive graphics and games. P5.js simplifies canvas manipulation, event handling, and animation, making it easier to bring creative ideas to life.
- Easy to Learn: Simple syntax and clear documentation.
- Canvas-Based: Provides easy manipulation of HTML5 canvas elements.
- Interactive: Simplifies event handling for user interactions.
- Creative Coding: Encourages experimentation and artistic expression through code.
- Community Support: Large and active community providing resources and assistance.
- Web-Friendly: Works seamlessly within web browsers, making it easy to share projects online.
4. How Do You Set Up a Basic P5.js Environment for Coding Snake?
To set up a basic P5.js environment for coding Snake, you need to include the P5.js library in your HTML file and create a JavaScript file for your game logic, and this setup provides the foundation for creating and running your game in a web browser.
- Include P5.js Library: Add a
<script>tag in your HTML file pointing to the P5.js library. - Create HTML File: Set up a basic HTML structure with a
<head>and<body>section. - Create JavaScript File: Create a separate
.jsfile (e.g.,sketch.js) for your game code. - Link JavaScript File: Link your
sketch.jsfile in the HTML using another<script>tag. - Setup Function: Use the
setup()function in P5.js to initialize the canvas and game settings. - Draw Function: Use the
draw()function to continuously update and render the game elements.
5. What Is the First Step in Coding the Snake Game in P5.js?
The first step in coding the Snake game in P5.js is to create the grid, which provides the structure for the snake and food to move within, and setting up the grid involves defining the grid size and drawing the grid lines on the canvas.
- Define Grid Size: Determine the size of each grid cell (e.g., 20×20 pixels).
- Calculate Canvas Dimensions: Ensure the canvas size is a multiple of the grid size for even alignment.
- Draw Grid Lines: Use nested loops to draw vertical and horizontal lines, creating the grid.
- Background Color: Set a background color for the grid to make it visually clear.
- Testing: Verify the grid is displayed correctly by running the code in a web browser.
const GRID_SIZE = 20;
function setup() {
createCanvas(400, 400);
}
function draw() {
background(220);
for (let x = 0; x < width; x += GRID_SIZE) {
for (let y = 0; y < height; y += GRID_SIZE) {
stroke(100);
strokeWeight(1);
line(x, 0, x, height);
line(0, y, width, y);
}
}
}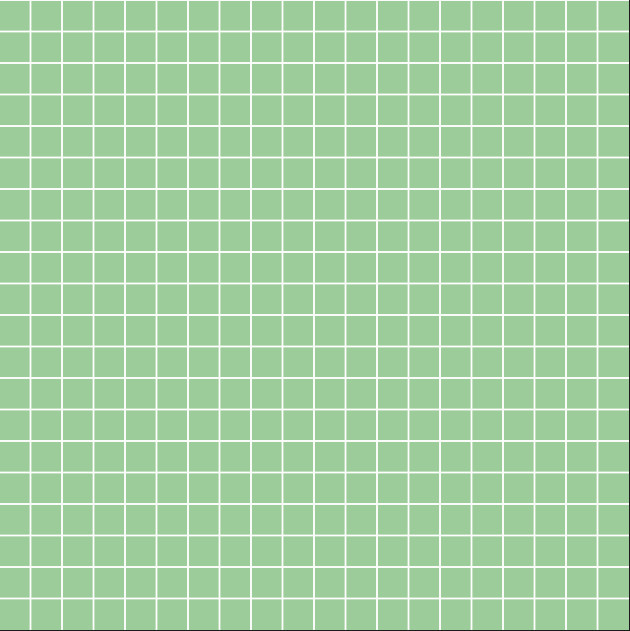 Green background white grid
6. How Do You Create the Snake Class in P5.js?
To create the Snake class in P5.js, define a class with properties for the snake’s body, direction, and methods for drawing and updating the snake, and this class encapsulates the snake’s behavior and appearance.
- Class Definition: Use the
classkeyword to define theSnakeclass. - Constructor: Initialize the snake’s body as an array of coordinates, starting with a single segment.
- Direction Property: Set an initial direction for the snake (e.g., right).
- Draw Method: Create a
draw()method to render the snake’s body as a series of rectangles. - Update Method: Implement an
update()method to move the snake based on its current direction.
class Snake {
  constructor() {
    this.body = [{ x: width / 2, y: height / 2 }];
    this.dir = 1; // 1 = right, 2 = down, 3 = left, 4 = up
  }

  draw() {
    fill(0);
    for (let b of this.body) {
      rect(b.x, b.y, width / GRID_SIZE, height / GRID_SIZE);
    }
  }

  update() {
    if (this.dir === 1) {
      this.body[0].x += width / GRID_SIZE;
    } else if (this.dir === 2) {
      this.body[0].y += height / GRID_SIZE;
    } else if (this.dir === 3) {
      this.body[0].x -= width / GRID_SIZE;
    } else if (this.dir === 4) {
      this.body[0].y -= height / GRID_SIZE;
    }
  }
}
7. How Do You Implement Snake Movement in P5.js?
Implementing snake movement in P5.js involves updating the snake’s position based on its direction, and this can be achieved by modifying the coordinates of the snake’s head in the update() method.
- Directional Logic: Use conditional statements to check the snake’s current direction.
- Update Coordinates: Modify the x and y coordinates of the snake’s head based on the direction and grid size.
- Body Movement: Shift the position of each body segment to follow the segment in front of it.
- Boundary Handling: Ensure the snake wraps around the canvas if it hits the edge.
- Frame Rate Control: Use
frameRate()to control the speed of the snake’s movement.
8. How Do You Add Keyboard Controls for the Snake?
Adding keyboard controls for the snake involves using the keyPressed() function in P5.js to detect when arrow keys are pressed and change the snake’s direction accordingly. This allows users to control the snake’s movement.
keyPressed()Function: Define thekeyPressed()function to handle key presses.- Arrow Key Detection: Use
keyCodeto detect when the arrow keys (LEFT_ARROW, RIGHT_ARROW, UP_ARROW, DOWN_ARROW) are pressed. - Direction Change: Update the snake’s
dirproperty based on the key pressed, ensuring the snake cannot reverse direction.
function keyPressed() {
if (keyCode === RIGHT_ARROW && snake.dir !== 3) {
snake.dir = 1;
} else if (keyCode === DOWN_ARROW && snake.dir !== 4) {
snake.dir = 2;
} else if (keyCode === LEFT_ARROW && snake.dir !== 1) {
snake.dir = 3;
} else if (keyCode === UP_ARROW && snake.dir !== 2) {
snake.dir = 4;
}
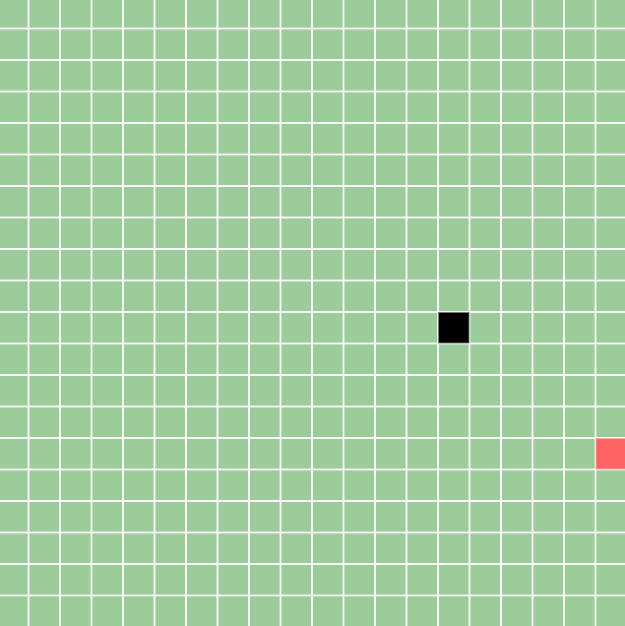
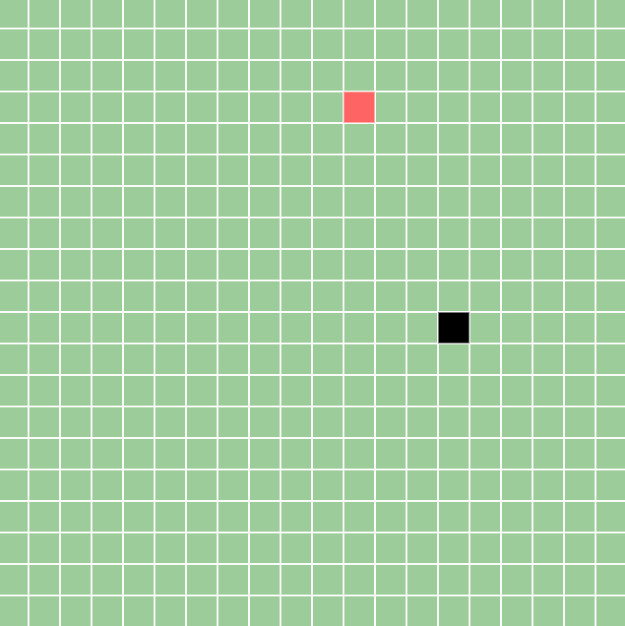
} snake moving
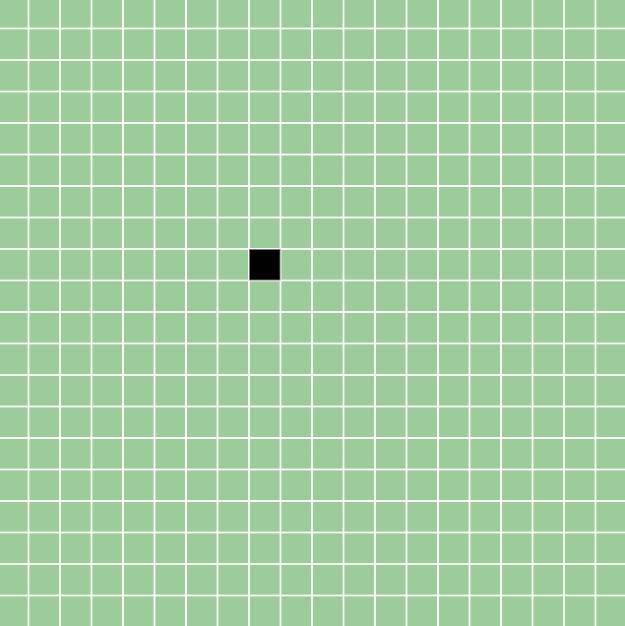
9. How Do You Create the Food Object and Implement Spawning?
Creating the food object and implementing spawning involves defining a Food class with properties for its position and a method to spawn it randomly on the grid. This ensures the snake has something to eat.
FoodClass: Define aFoodclass withxandyproperties for its position.spawn()Method: Create aspawn()method to generate random coordinates for the food within the grid.- Grid Alignment: Ensure the food’s coordinates align with the grid by using modulo arithmetic.
- Draw Method: Implement a
draw()method to render the food as a rectangle.
class Food {
  constructor() {
    this.spawn();
  }

  spawn() {
    let randX = random(width);
    let randY = random(height);
    this.x = randX - randX % (width / GRID_SIZE);
    this.y = randY - randY % (height / GRID_SIZE);
  }

  draw() {
    fill(255, 100, 100);
    rect(this.x, this.y, width / GRID_SIZE, height / GRID_SIZE);
  }
}
10. How Do You Handle the Snake Eating the Food?
Handling the snake eating the food involves checking if the snake’s head is at the same position as the food, and if so, spawning new food and growing the snake, and this creates the core gameplay loop.
hasEatenFood()Method: Create a method in theSnakeclass to check if the snake’s head coordinates match the food’s coordinates.- Food Respawn: If the snake has eaten the food, call the
spawn()method of theFoodobject to create new food at a different location. - Snake Growth: Implement a
grow()method in theSnakeclass to increase the snake’s body length when it eats food.
class Snake {
// ... existing code ...
hasEatenFood() {
if (this.body[0].x === food.x && this.body[0].y === food.y) {
return true;
}
return false;
}
grow() {
this.body.push({ x: this.lastX, y: this.lastY });
}
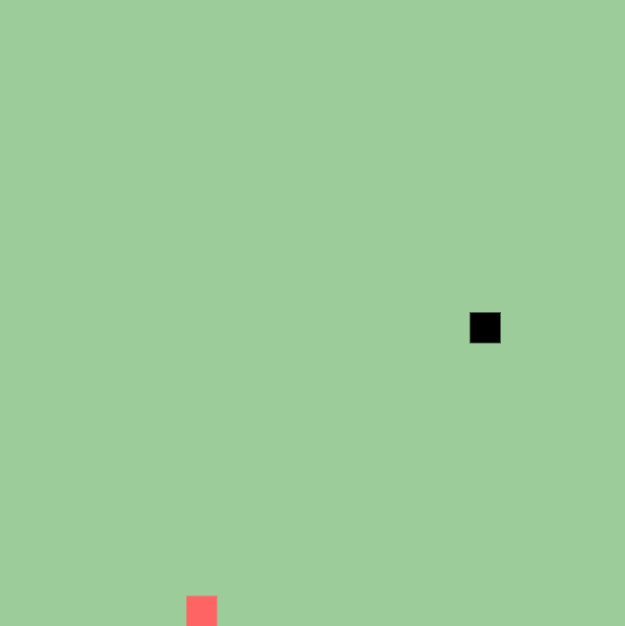
} snake eating but not growing
11. How Do You Implement Snake Growth When It Eats?
Implementing snake growth when it eats involves adding a new segment to the snake’s body, and this new segment should be added at the end of the snake, maintaining its continuous movement.
- Track Last Position: Store the last position of the snake’s tail before it moves.
grow()Method: In thegrow()method, add a new segment to the snake’s body at the stored last position.- Update Body: In the
update()method, update the position of each body segment to follow the segment in front of it.
class Snake {
  constructor() {
    this.body = [{ x: width / 2, y: height / 2 }];
    this.dir = 1;
    this.lastX = width / 2;
    this.lastY = height / 2;
  }

  update() {
    this.lastX = this.body[this.body.length - 1].x;
    this.lastY = this.body[this.body.length - 1].y;

    for (let i = this.body.length - 1; i >= 1; i--) {
      this.body[i].x = this.body[i - 1].x;
      this.body[i].y = this.body[i - 1].y;
    }

    if (this.dir === 1) {
      this.body[0].x += width / GRID_SIZE;
    } else if (this.dir === 2) {
      this.body[0].y += height / GRID_SIZE;
    } else if (this.dir === 3) {
      this.body[0].x -= width / GRID_SIZE;
    } else if (this.dir === 4) {
      this.body[0].y -= height / GRID_SIZE;
    }
  }

  grow() {
    this.body.push({ x: this.lastX, y: this.lastY });
  }
}
snake now eating and growing
12. How Do You Implement Collision Detection in P5.js Snake?
Implementing collision detection in P5.js Snake involves checking if the snake collides with itself or the boundaries of the canvas, and this ensures the game ends when a collision occurs.
- Self-Collision: Check if the snake’s head coordinates match the coordinates of any other segment in its body.
- Boundary Collision: Check if the snake’s head goes beyond the canvas boundaries.
- Restart Game: If a collision occurs, reset the snake’s position and length to restart the game.
class Snake {
  // ... existing code ...

  hitDetection() {
    for (let i = 1; i < this.body.length; i++) {
      if (this.body[0].x === this.body[i].x && this.body[0].y === this.body[i].y) {
        this.spawn();
      }
    }
  }

  update() {
    this.hitDetection();
    // ... rest of the update method ...
  }

  spawn() {
    this.body = [{ x: width / 2, y: height / 2 }];
    this.dir = 1;
    this.lastX = width / 2;
    this.lastY = height / 2;
  }
}
13. How Do You Restart the Game After a Collision?
To restart the game after a collision, you need to reset the snake’s position, direction, and length, as well as respawn the food, and this ensures a fresh start for the player.
- Reset Snake: Call the
spawn()method to reset the snake’s initial position and direction. - Respawn Food: Call the
spawn()method of theFoodobject to create new food. - Clear Snake Body: If necessary, clear the snake’s body array and add the initial segment.
14. How Do You Add a Scoring System to the Snake Game?
Adding a scoring system to the Snake game involves tracking the snake’s length and displaying it as the score, and this gives the player a measure of their progress.
- Score Variable: Initialize a variable to store the score (e.g.,
let score = 0;). - Update Score: Increment the score each time the snake eats food (e.g.,
score++;). - Display Score: Use the
text()function in P5.js to display the score on the canvas.
let score = 0;

function draw() {
  background(220);
  // ... game logic ...

  if (snake.hasEatenFood()) {
    food.spawn();
    snake.grow();
    score++;
  }

  fill(0);
  textSize(20);
  text("Score: " + score, 10, 30);
}
15. How Do You Ensure the Food Doesn’t Spawn on the Snake?
To ensure the food doesn’t spawn on the snake, you need to check if the generated food coordinates match any of the snake’s body segments, and if so, regenerate the food’s position. This prevents the food from being uncollectible.
- Check Coordinates: In the
spawn()method of theFoodclass, check if the generated coordinates match any segment in the snake’s body. - Regenerate Food: If the coordinates match, regenerate the food’s position until it doesn’t overlap with the snake.
class Food {
  // ... existing code ...

  spawn() {
    let newX, newY;
    let overlapping;

    do {
      overlapping = false;
      newX = random(width);
      newY = random(height);
      this.x = newX - newX % (width / GRID_SIZE);
      this.y = newY - newY % (height / GRID_SIZE);

      for (let segment of snake.body) {
        if (this.x === segment.x && this.y === segment.y) {
          overlapping = true;
          break;
        }
      }
    } while (overlapping);
  }
}
16. How Can You Customize the Appearance of the Snake and Food?
You can customize the appearance of the snake and food by changing the fill colors, stroke colors, and sizes of the rectangles used to draw them, and this allows you to personalize the game’s visuals.
- Fill Color: Use the
fill()function to change the fill color of the snake and food. - Stroke Color: Use the
stroke()function to change the stroke color of the snake and food. - Rectangle Size: Modify the width and height parameters in the
rect()function to change the size of the snake and food.
class Snake {
  draw() {
    fill(50, 200, 50); // Green snake
    for (let b of this.body) {
      rect(b.x, b.y, width / GRID_SIZE, height / GRID_SIZE);
    }
  }
}

class Food {
  draw() {
    fill(200, 50, 50); // Red food
    rect(this.x, this.y, width / GRID_SIZE, height / GRID_SIZE);
  }
}
17. What Are Some Advanced Features You Can Add to the Snake Game?
Some advanced features you can add to the Snake game include:
- Wall Wrapping: Allowing the snake to reappear on the opposite side of the canvas when it hits a wall.
- Speed Increase: Increasing the snake’s speed as the score increases.
- Power-Ups: Adding special items that give the snake temporary abilities (e.g., invincibility or speed boost).
- Obstacles: Adding static or moving obstacles that the snake must avoid.
- Level Design: Creating different levels with varying grid layouts and challenges.
18. How Do You Implement Wall Wrapping in the Snake Game?
Implementing wall wrapping in the Snake game involves checking if the snake’s head goes beyond the canvas boundaries and, if so, repositioning it to the opposite side, and this creates a continuous playing field.
- Boundary Checks: In the
update()method of theSnakeclass, check if the snake’s headxandycoordinates are outside the canvas boundaries. - Reposition Snake: If the snake goes off the left edge (
x < 0), set itsxcoordinate to the right edge (width - GRID_SIZE). Similarly, handle the right, top, and bottom edges.
class Snake {
  // ... existing code ...

  update() {
    // ... existing code ...

    if (this.body[0].x < 0) {
      this.body[0].x = width - width / GRID_SIZE;
    } else if (this.body[0].x >= width) {
      this.body[0].x = 0;
    }

    if (this.body[0].y < 0) {
      this.body[0].y = height - height / GRID_SIZE;
    } else if (this.body[0].y >= height) {
      this.body[0].y = 0;
    }
  }
}
19. How Can You Adjust the Game Speed Dynamically?
You can adjust the game speed dynamically by changing the frame rate based on the score or other game conditions, and this can be done using the frameRate() function in P5.js.
- Variable Frame Rate: Define a variable to store the base frame rate (e.g.,
let baseFrameRate = 5;). - Adjust Frame Rate: In the
draw()function, calculate the new frame rate based on the score and set it usingframeRate(baseFrameRate + score / 10);. This increases the frame rate (and thus the game speed) as the score increases.
let baseFrameRate = 5;

function draw() {
  background(220);
  frameRate(baseFrameRate + score / 10);
  // ... rest of the draw function ...
}
20. How Do You Handle Game Over Conditions?
Handling game over conditions involves detecting collisions (with itself or the walls) and stopping the game, displaying a game over message, and providing an option to restart, and this creates a complete game experience.
- Collision Detection: Implement collision detection as described earlier.
- Game Over Flag: Set a boolean variable to indicate whether the game is over (e.g.,
let gameOver = false;). - Stop Game: When a collision occurs, set
gameOver = true;and stop updating the game elements. - Display Message: Use the
text()function to display a “Game Over” message on the canvas. - Restart Option: Add a button or key press to reset the game and set
gameOver = false;.
let gameOver = false;

function draw() {
  background(220);

  if (!gameOver) {
    // ... game logic ...
  } else {
    fill(0);
    textSize(32);
    textAlign(CENTER, CENTER);
    text("Game Over! Press ENTER to restart", width / 2, height / 2);
  }
}

function keyPressed() {
  if (gameOver && keyCode === ENTER) {
    gameOver = false;
    score = 0;
    snake.spawn();
    food.spawn();
  }
}
the final result of the snake game
Implementing the Nokia Snake game in P5.js is a rewarding project that combines nostalgia with practical coding skills. By following the steps outlined in this article, you can create a functional and engaging version of the classic game. From setting up the environment and coding the basic elements to adding advanced features and customizations, this guide provides a comprehensive roadmap for your game development journey.
FAQ: Nokia Snake Game
1. What was the original Nokia Snake game written in?
The original Nokia Snake game was written in assembly language, which allowed for efficient use of the limited processing power and memory available on early Nokia phones.
2. When was the Nokia Snake game first introduced?
The Nokia Snake game was first introduced in 1997 on the Nokia 6110 phone.
3. Who invented the Nokia Snake game?
The concept of the Snake game was created by Taneli Armanto, a design engineer at Nokia.
4. What are some variations of the Snake game?
Some variations of the Snake game include different grid layouts, multiple snakes, power-ups, obstacles, and different scoring systems. Some popular versions include Snake II, Snake Xenzia, and 3D Snake.
5. Can I play the original Nokia Snake game online?
Yes, you can play the original Nokia Snake game online through various emulators and web-based versions that replicate the original gameplay.
6. What is the highest score ever recorded on the original Nokia Snake game?
The highest score ever recorded on the original Nokia Snake game is difficult to verify due to the lack of official leaderboards, but skilled players have reported scores in the tens of thousands.
7. How can I make my Snake game more challenging?
You can make your Snake game more challenging by increasing the snake’s speed, adding obstacles, reducing the grid size, or implementing a timer.
8. What is the significance of the Snake game in mobile gaming history?
The Snake game is significant in mobile gaming history because it was one of the first and most popular games on mobile phones, setting the stage for the mobile gaming industry. Its simplicity and accessibility made it a cultural phenomenon.
9. Are there any open-source versions of the Snake game available?
Yes, there are many open-source versions of the Snake game available on platforms like GitHub, written in various programming languages. These versions can be modified and customized to create unique variations of the game.
10. How do I prevent the Snake from going backward into itself?
To prevent the Snake from going backward into itself, ensure that the direction change logic does not allow the snake to reverse its current direction immediately. For example, if the snake is moving right, the player should not be able to immediately move it to the left.
Is your Polar device acting up? Don’t let technical issues slow you down. Visit polarservicecenter.net for quick solutions, warranty information, and expert support. Get back to peak performance with reliable assistance.
Address: 2902 Bluff St, Boulder, CO 80301, United States
Phone: +1 (303) 492-7080
Website: polarservicecenter.net.